
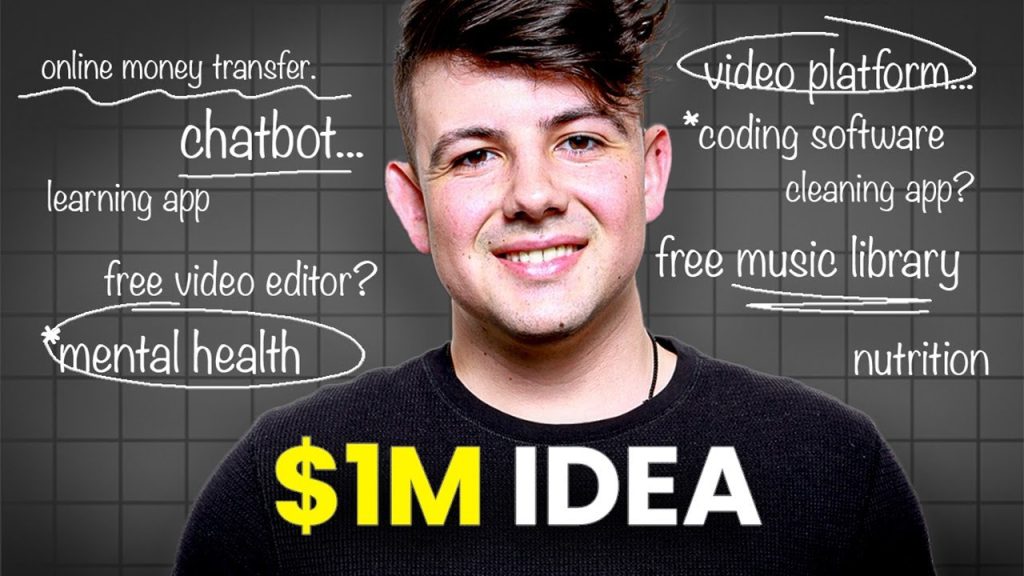
You’re sitting on an idea. Maybe it came to you in the middle of a frustrating experience with a clunky app. Or maybe it’s something you’ve been thinking about for months—an app that could change how people work, live, or connect.
But here’s the challenge:
Most people stop at the idea.
They never move past the “what if.” Why? Because building an app seems risky, expensive, and complex. There are horror stories about spending tens of thousands on development, only to realize no one wants the product. Or launching something clunky that users abandon in minutes.
But it doesn’t have to be that way.
At SapidBlue, we’ve helped countless entrepreneurs, startups, and founders take raw ideas and turn them into real, validated digital products—without blowing up timelines or burning through budgets.
In this guide, we’ll walk you through a step-by-step process to take your app idea and transform it into a real, live product without wasting time, money, or resources. We’ll show you how to start small, learn quickly, and iterate effectively, so you can confidently bring your idea to life.
Step 1: Validate Your App Idea – Before You Invest a Dollar
Before you dive into the costly and time-consuming process of development, you need to validate your idea. This is non-negotiable. It’s tempting to jump straight into development, but without proof that there’s demand, you’re just building on a hunch.
Validation answers one critical question: Will people pay for or use my app?
Validation answers one critical question: Will people pay for or use my app?
Start with the Problem, Not the App
The first thing you need to do is focus on the problem your app is solving. Without a genuine, pressing problem to address, your idea may fall flat, no matter how cool the app is.
Ask yourself:
- What specific pain point are you solving?
- How does this pain point impact users daily?
- Can people live with the current solutions?
- What makes your app a better solution?
For example, if you’re creating a task management app, don’t just focus on the features. Think about how it helps users stay on top of their tasks, avoid missed deadlines, or streamline project management.
Define your target audience clearly
When you’re defining your audience, avoid vague descriptions like “everyone.” Instead, focus on a specific group that experiences your problem.
- Who is your ideal user?
- What are their habits, behaviors, and demographics?
- How can your app make their lives easier or more enjoyable?
Start by creating a user persona—a semi-fictional character that represents your ideal customer. This will help you stay focused and ensure you’re building something that speaks directly to their needs.
For example, if you’re building an app that helps remote workers organize their tasks, your persona could be a freelancer who juggles multiple projects and needs an intuitive, easy-to-use interface.
Pro Tip:
Don’t fear competition. A lack of competitors often means a lack of demand. Instead, find the gaps your app can fill.

Conduct Smart, Low-Cost Market Research
Once you’ve defined your target audience, it’s time to dig deeper into market research. Don’t spend a fortune—use the tools and platforms available to you.
- Google Trends: Search for your app’s main keyword to see interest over time.
- Reddit and Quora: These forums are great for finding real conversations about your target market’s problems.
- App Store & Google Play Store: Search for competitors and read their reviews. Are users satisfied? What do they want more of?
Pro Tip:
Use online surveys or interviews with a small sample size to directly ask potential users what features they want, what frustrates them about existing apps, and how your solution could help.
Step 2: Define the Core Features – Focus on What Matters
Once you know the idea is worth pursuing, it’s time to define what you’ll actually build.
Here’s the trap: founders want to build everything at once. Every feature, every button, every idea—jammed into version 1.
That’s a fast track to burnout and budget blowout.
What is an MVP?
MVP stands for Minimum Viable Product. It’s not a demo or an incomplete version of your app. It’s the most basic, stripped-down version that solves the problem in a meaningful way—without any fluff.
The goal is to build only the core features necessary to solve the pain point you’ve validated. Avoid adding extra functionality that can be saved for future versions.
For example, Instagram started as an app to share photos with simple filters—no stories, no direct messaging, and no reels. Over time, they added features based on user feedback.
Example:
Instagram started as a photo-sharing app with filters—no stories, reels, or DMs. Uber launched with just one city, one ride option.
How to Prioritize Features
Once you have your idea validated, it’s time to decide what features make the cut. Use frameworks like:
1 MoSCoW Method:
- Must-Have: Features that are essential for your MVP. These are non-negotiable.
- Should-Have: Features that are important but not necessary for launch.
- Could-Have: Features that would be nice to have, but aren’t critical at this stage.
- Won’t-Have: Features that are out of scope for now.
2. Kano Model:
Categorize features as:
- Basic Needs: Users expect these features (e.g., sign-in, notifications).
- Excitement Needs: Features that delight users and differentiate your app (e.g., unique customization options).
3. User Journey Mapping:
Identify key actions users need to take to achieve their goals. What is the most critical path users should follow in your app? Focus on building those flows first.
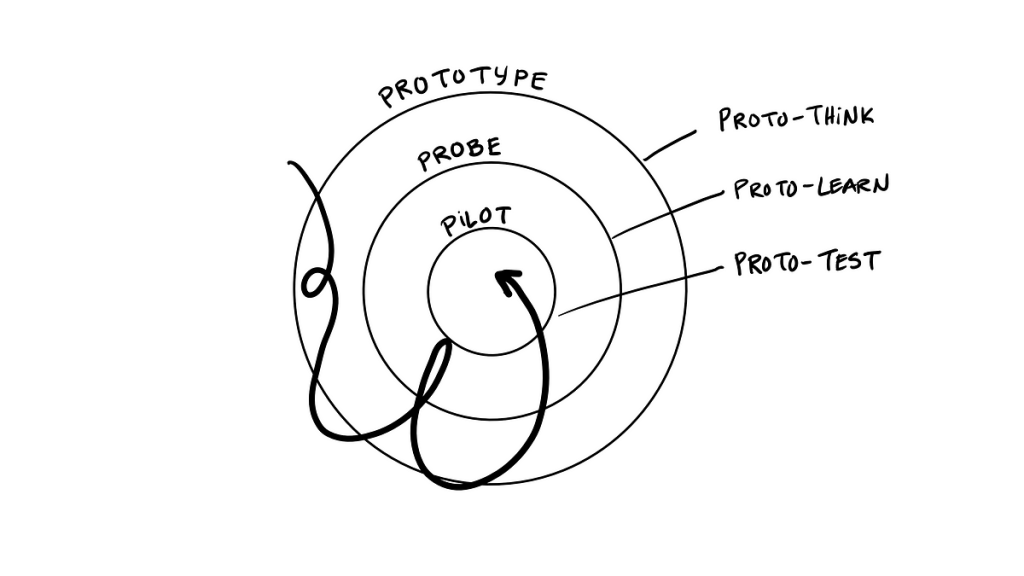
Step 3: Build a Clickable Prototype – Test the Vision, Not the Code
A clickable prototype is your opportunity to visualize your app without building it. This step is essential because it allows you to test user experience (UX) and design before you commit resources to actual development.
What is a Prototype?
A prototype is a non-functional model of your app that showcases the user interface (UI) and basic interactions. It’s like a digital mockup, but users can actually click through it.
Prototyping tools like Figma or InVision allow you to simulate the look and feel of your app, so you can test:
- How users navigate your app
- If they understand your design intuitively
- Whether they can complete tasks with ease
Tools for Prototyping
- Figma: One of the most popular tools for both design and prototyping.
- InVision: Great for interactive prototypes.
Why Prototyping Saves Time and Money
The real beauty of prototyping is that it allows you to test your idea without spending huge amounts of time and money. Early user feedback on your prototype will guide your design decisions and help you make important adjustments before development begins.
Pro Tip: Test your prototype with at least five users from your target audience. Watch them interact with it and gather insights on where they get stuck or confused.
Image Suggestion: A visual showing a simple wireframe, followed by the same design turned into a clickable prototype.
Want a prototype built in 7 days? Let SapidBlue build yours.
Step 4: Choose the Right Development Partner
Now comes the critical choice: who will build your app?
Your development team is not just a group of coders. They should understand product strategy, user experience, and agile methodologies.
Development Options
1. Development Agencies (like SapidBlue)
Agencies offer the benefit of having a full product team, including designers, developers, and product strategists. This option can be cost-effective and provide faster time to market because agencies have experience working with startups and scaling apps efficiently.
2. Freelancers
Freelancers can be a good option if your app is simple and you’re on a tight budget. However, you risk inconsistent quality, missed deadlines, or lack of long-term commitment.
3. In-house Team
Building an in-house team gives you full control over your project, but it’s often expensive and time-consuming. Hiring the right talent takes time, and managing a team means handling HR and operational costs.
What to Ask When Choosing a Development Partner
- Have they built MVPs before?
- Can they help with both design and development?
- What is their communication and project management process like?
- What’s their process for user feedback and iterations?
At SapidBlue, we focus on lean development, ensuring we’re building what matters most, fast and efficiently, so you can launch your MVP and start getting real user feedback.

Step 5: Build and Launch Your MVP – Get to Market Fast
With your team in place and your MVP defined, it’s time to bring your app to life. However, keep in mind that the goal here is not perfection—it’s learning.
Use Lean Development Methods
Focus on Agile or Scrum frameworks. These methodologies allow you to build in sprints, get user feedback, and make iterations without overbuilding.
- Plan in 2-week sprints: Build core features, then test.
- Use CI/CD pipelines to integrate new features and fix bugs quickly.
Launching Your MVP
- Focus on early adopters and gather their feedback.
- Track analytics to measure usage patterns, so you can understand how users interact with your app.
- Be ready to iterate quickly. Don’t be afraid to fix issues, tweak features, or even pivot if needed.
Pro Tip:
Launch to a small group first. Don’t go big from day one. The feedback from this group will be crucial for fine-tuning your app before scaling.
Common Mistakes to Avoid
We’ve seen it all. Here are some common pitfalls you should be aware of:
- Skipping Validation: Without validating your idea, you might build something nobody needs.
- Overbuilding: Don’t fall into the trap of trying to add every feature in the first version. Stick to your core vision.
- Ignoring Feedback: Your early users are your best source of information. Don’t ignore their input.
- Underestimating UX/UI: If users can’t navigate your app easily, they’ll leave, no matter how good your idea is.
- Waiting Too Long: Perfection can be the enemy of progress. Get something out there quickly, so you can learn and grow.
Conclusion: The Time to Build Is Now
Turning your app idea into reality doesn’t require a big budget or years of work. By validating your idea, focusing on your core features, prototyping, and working with the right team, you can go from concept to launch without wasting time or money.
Remember, simplicity is key. Keep your MVP lean and efficient, and let user feedback guide your next steps.
At SapidBlue, we specialize in helping founders like you take ideas from concept to reality quickly and efficiently. Our goal is to help you create an app that’s not just functional, but truly meets the needs of your users.
Don’t wait for the perfect moment. Your idea is worth pursuing, and SapidBlue is here to help.

FAQ – Quick Answers to Common Questions
1. How do I know if my app idea is good?
A good idea solves a real problem for a specific group of people. Validate it through interviews, surveys, and prototype feedback.
2. How much does it cost to build an MVP?
Anywhere from $10k–$50k depending on features, complexity, and your development team. SapidBlue specializes in affordable, scalable MVPs.
3. How long will it take to launch my MVP?
On average, 2–4 months from planning to launch. It can be faster with a focused scope and an experienced team.